What kind of warrior are you?
Are you the strong, silent type, the self-defense type, or the attack ’em type?
In yoga, there is a warrior for every personality, ultimately leading to inner balance and peace. The Warrior 1 Pose can help us ground ourselves, build energy, calm our energy, and enhance our balance and focus.
The Benefits of Warrior 1
Warrior 1 in yoga is a fundamental pose similar to a lunge, a runner’s warm-up stretch, or a martial arts stance.
One study has recognized that regular yoga practice may even contribute to lower blood pressure, making it perfect for older individuals! Yoga, along with a healthy lifestyle, has even been shown to mitigate the effects with individuals who have risk factors for cardiovascular disease.
The Warrior 1 pose is a testament to the enduring strength of yoga, making it accessible to people of all ages. This pose benefits joint health, especially in areas prone to stiffness with age, like the hips and knees.
Did you know?
Did you know that the Warrior 1 pose engages various muscle groups, promoting balance, flexibility, relaxation and strength that are particularly beneficial for older individuals?
The stretch and engagement of various muscle groups in this pose can invigorate your practice, providing energy or grounding while giving you that boost when you’re with your grandkids!
Incorporating Warrior 1 into your yoga session
In this yoga pose, one leg is positioned forward, hip-distance apart from the other leg. The front knee is bent, ensuring it’s over the heel and not extending too far forward beyond the toes.
The foot of the bent knee leg faces forward, with slight variations based on individual flexibility. The back leg remains straight, with the foot slightly turned outward in one variation or completely grounded in another.
An advanced variation of this practice involves lengthening and lowering the entire pose by pointing the back foot forward and raising the heel for benefits.
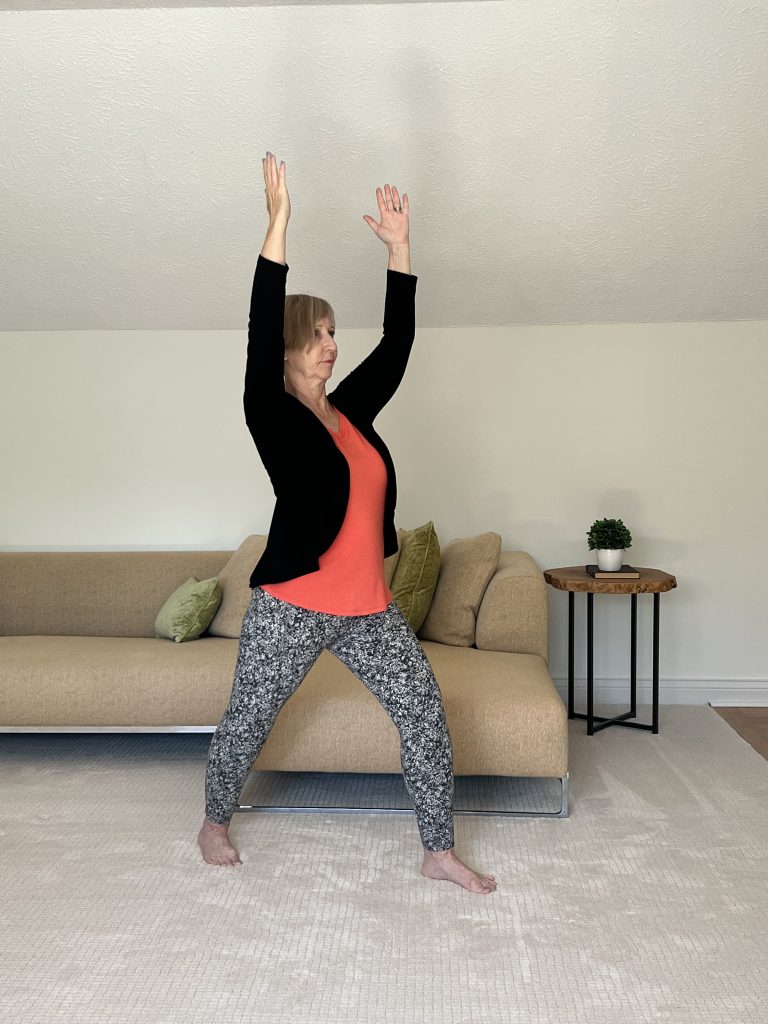
For beginners, especially those aged 60 and above, I recommend you wait until you’re comfortable with the standard version (seen on the left) before attempting the advanced variation!
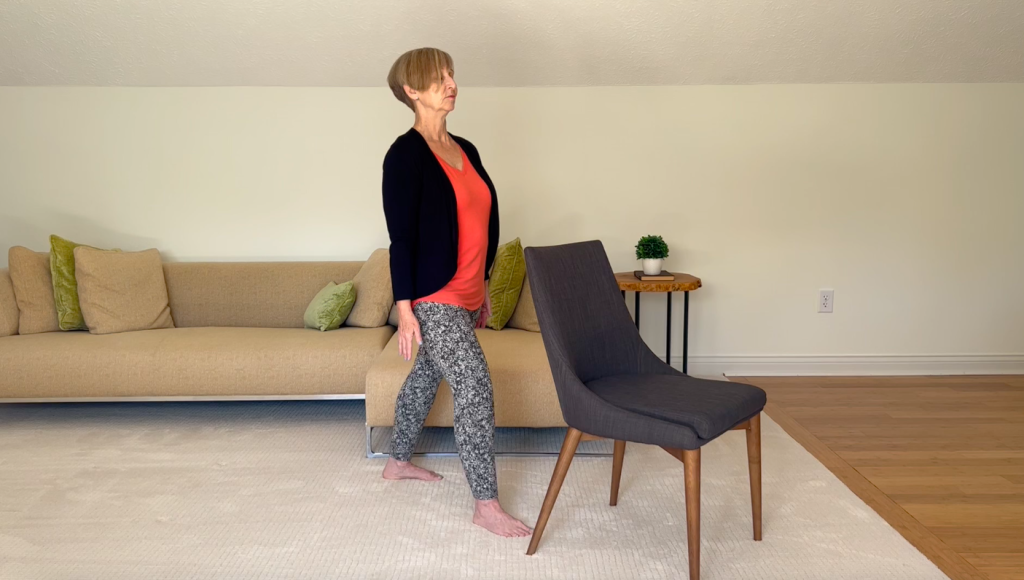
Use a chair or countertop for balance support on one side.
In both variations, it’s essential to keep the baby toe side of the feet grounded to aid balance. Achieving balance also requires proper alignment from the head through the spine to the floor. The head should remain directly above the shoulders to enable various arm positions.
The most common arm position for Warrior 1 pose is arms extended overhead, palms facing each other (as seen in the Standard Warrior 1 pose above). While seemingly straightforward, this can be challenging for those with shoulder issues.
Two alternative arm positions are:
Arm Position 1
Arms down by your sides, palms facing toward you.
Arm Position 2

Arms straight up, palms face each other. It is okay if the elbows are slightly bent. If this hurts, return to position 1.
For beginners or those dealing with chronic issues or injuries, I suggest starting by focusing on the lower body posture on each side before incorporating arm movements once you feel balanced.
Relaxation Through Breath
Breathing is a vital component of the pose. Finding your breath helps you relax into it. While complete relaxation requires multiple breaths, begin with 1-3 breaths on each side.
While the Warrior 1 pose develops outer physical strength, it also cultivates inner strength and resilience, mirroring the warrior’s mental fortitude and calmness.
Breathing can be a complex topic. The goal is to breathe in and out through the nose. If this isn’t your current practice, it’s alright. Coordinating the Warrior 1 pose with deep, mindful breaths can promote relaxation, reduce stress, and help you get into a calm state when your grandchildren are running around!
Start by inviting the breath in through the nose and exhale in any comfortable way. As you exhale, release tension in your jaw, shoulders, and tailbone, connecting with the ground beneath your feet. Gradually work on slowing down the breath—try extending the inhale or exhale by a second for ultimate relaxation!
Improve your focus
Applying a yogic perspective to the Warrior 1 pose offers numerous benefits. We’ve covered grounding, balance, relaxation through breath, and now, focus.
Once you’re in Warrior 1 pose and your arms are positioned, find a focal point. This could be a spot on the wall in front of you, a few feet away, at eye level, and preferably steady. Let your eyes relax, and use this point if your mind starts to wander. Soften your eyelids.
You can initiate the focus point with breathing whenever you want to tap into your inner, tranquil warrior. Even if you can’t perform the full pose, focusing and controlled breathing remain beneficial.
I invite you to join me in practicing the Warrior 1 pose.
Part 1/2
Part 2/2
Would you like to learn more adapted yoga poses? Click below & Subscribe to receive adapted yoga poses right to your inbox!
